Python For Cyber Security

Introduction to python programming for cyber security
Variables, Operator, and Combining Operator
Data Types and Type Casting
Data Structure
Input, Printing, and Formatting Outputs
Conditional Statements and Control flow of statements
Functions and Modules
Object Oriented Programming Part 1 - Classes and Instaces
Object Oriented Programming Part 2 - Inheritance, Child Classes, and Special Methods
Files
Intermediate and Advances Concepts
Introduction to Python for Cyber Security
Python, created in 1990 by Guido van Rossum, is a powerful and beginner-friendly programming language
that runs on many operating systems such as Windows, Linux, and Mac OS. Its clean and readable syntax
makes it easy to learn, while its powerful libraries make it suitable for building advanced
applications.
In the field of cyber security, Python is widely used to automate tasks, analyze security data, and
build tools that help protect systems and networks. Many ethical hackers, penetration testers, and
digital forensics professionals use Python to scan networks, detect vulnerabilities, analyze logs, and
develop security tools.
At Andrew CyberSec Platform, this guide will help you learn Python step by step, starting from the basic
concepts such as variables, operators, data types, and functions, and gradually moving to more practical
cyber security applications.
By the end of this section, you will apply your knowledge through practical projects such as:
==>Port Scanner
==>Network Scanner
==>Password Strength Checker
==>Log Analyzer
==>Brute Force Simulation Tool and
==>File Integrity Checker
These projects will help you understand how Python is used in real-world cyber security and will
strengthen your practical skills in security automation and analysis.
A Python Interpreter is a program that reads and executes Python code line by line. It works by translating the Python code you write into instructions that the computer can understand and run. Instead of converting the whole program at once like some languages do, the Python interpreter processes the code step by step and immediately shows the result. This is why Python is called an interpreted language.
To ensure that you have Python Interpreter installed correctly, go
to
official Python
installation
instructions.
website
(
), and follow the
Currently, the Python
website offers a simple executable to install Python
on Windows and Mac OS.
Or if you use smart phone you can download code editor special for python on this link from google
playstore PyCode for Smart Phones
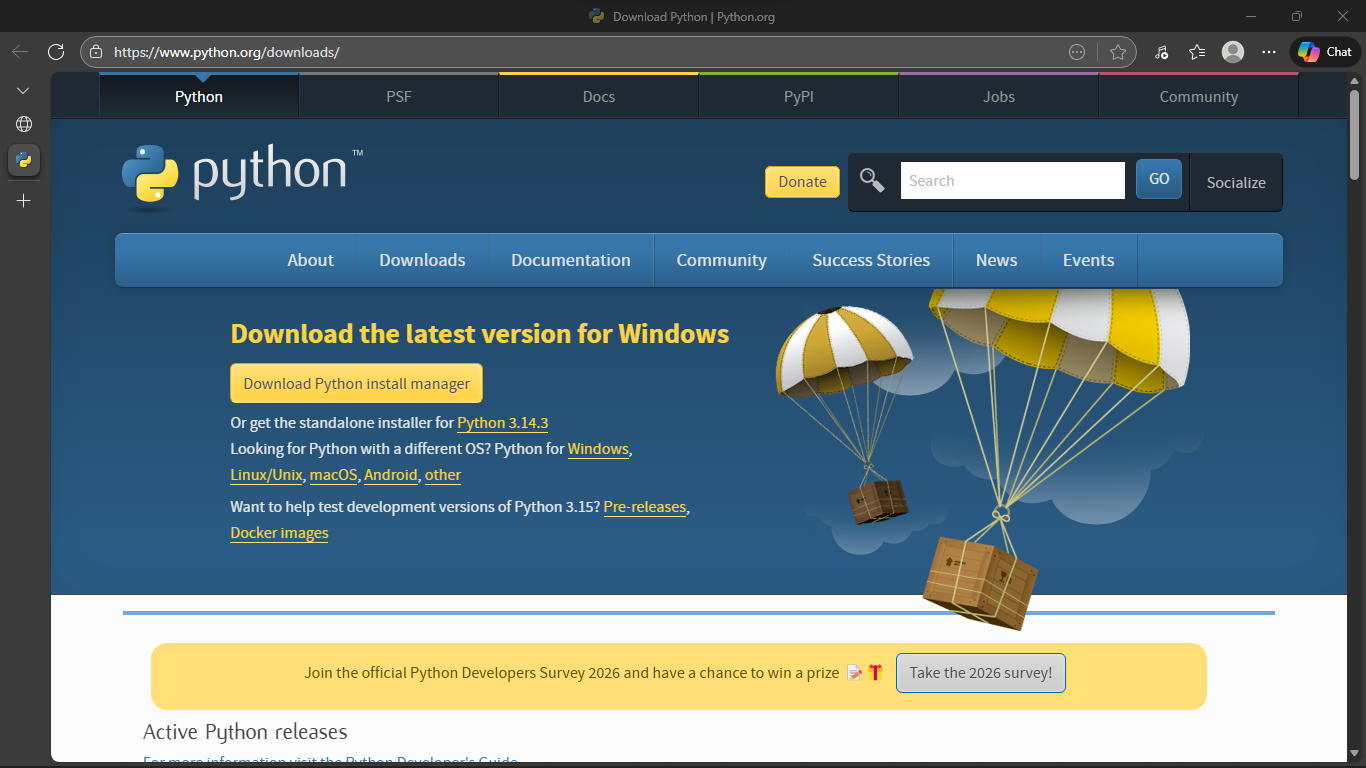
As the Windows version is the most easily accessible version of Python and since Windows is the most common OS, this content assumes that the reader is following along on a Windows OS. That said, if you are following along on a different OS, you don’t need to worry. Differences between Python across systems are very minimal, usually restricted to differences in platform-specific libraries
For more information and Instruction on how to Install Python Interpreter on your computer or phone reach the video below.
Why Use an IDE Instead of a Normal Code Editor?
A normal code editor only helps you write code. But an IDE (Integrated Development Environment) provides
a complete environment for programming. It includes a code editor, terminal, debugging tools, project
management, auto-completion, and many other features that make coding easier, faster, and more
organized.
Because of these advantages, many professional developers prefer using an IDE instead of a simple code
editor, and the IDE choose to use is PyCharm. Link to download PyCharm IDE PyCharm IDE
PyCharm is one of the best IDEs designed specifically for Python development. It provides powerful features such as smart code completion, error detection, debugging tools, and built-in support for Python projects. With PyCharm, you can write, run, test, and manage Python programs in one place. This makes it an excellent choice for beginners and professionals who want a powerful and organized environment for Python development.
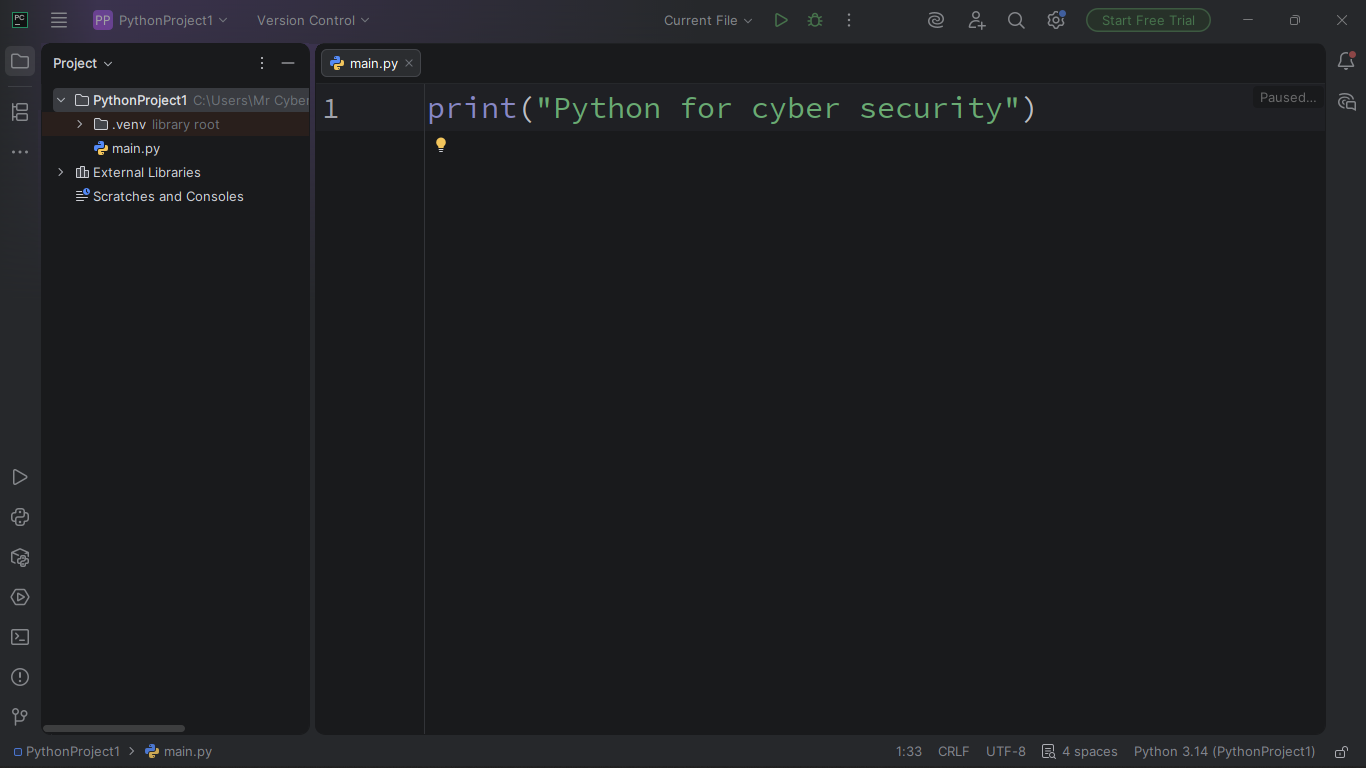
As you can see in the image above, when you open PyCharm and see the interface, you can navigate up to the file option in the top left corner. Opening the file drop-down menu will let you either open an existing project or create a new project. Opening an existing project enables you to reopen projects you’ve already started, saved, or even open projects that other people have worked on, which you have downloaded/cloned. For now, just create a new project for the exercises through the “File” option in the top left.
The New Project dialog box may look slightly different depending on which version of PyCharm you are using, but it should ask you to select a project interpreter.
The default virtual environment (virtualenv) is fine for now, and it should automatically detect your base Python interpreter if it is correctly installed on your computer.
After this, you can create a folder to hold the scripts you create by right-clicking in the project frame and choosing the “New” option from the drop-down menu. To create a new Python script, just right-click on the folder you’ve created, navigate to “New,” and then click the “Python File” option. Enter the name of your new file Python file.
After you create a new Python file, it should automatically open in the editor panel to the right. You can enter code into the editor. If, for some reason, the editor didn’t automatically open the file, double-click on the file to open it up in the editor. PyCharm should automatically save changes to the f ile, which means you don’t need to worry about manually saving them. If, for some reason, the file doesn’t auto-save, or you just want to be sure it has saved, you can right-click on the file to be presented with a drop-down menu that should contain the option to save the file. You can also press “Ctrl + S” to save all files currently open in PyCharm.
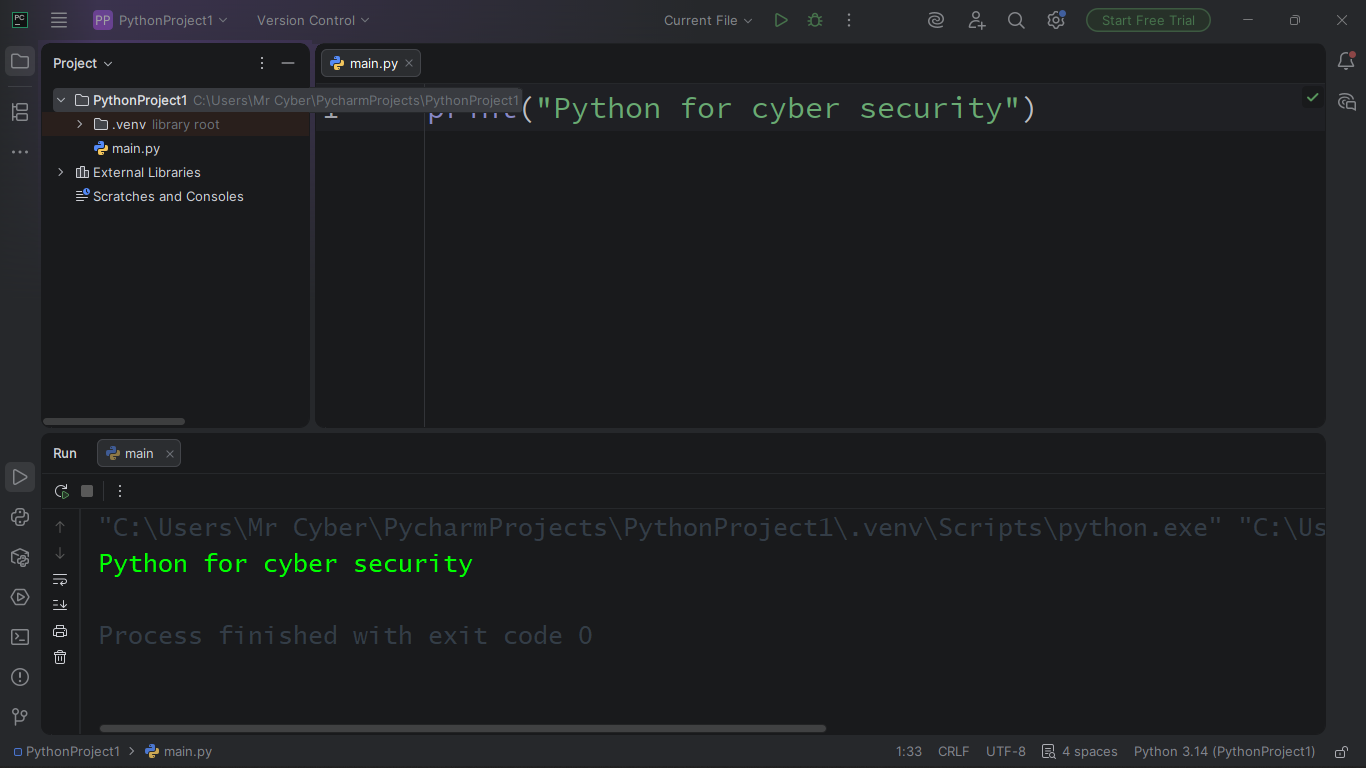
Once you’ve written some code and want to try running it, you can either navigate up to the “Run” tab on the top toolbar and select “Run (Current file name here),” or press “Shift + F10”. The image below shows a program has finished its run in PyCharm’s compiler . Note that the results of the program are printed to the built-in terminal at the bottom of the IDE
Comments are notes written inside the code to explain what the program does. They are ignored by the Python interpreter and are only meant to help the programmer understand the code.
A single-line comment is used to write a short explanation on one line.
In Python, it starts with the "#" symbol.
# Python Code
# This is a Comment one
# This is a Comment two
print("Hello, World") # This code is Running
print("Python For Cyber Security") # This codoe is Running
A multi-line comment is used when you want to write longer explanations that take several lines.
In Python, it is commonly written using triple quotes (''' ''' or """ """).
"""
This program demonstrates
how to write multiple
line comments in Python
"""
print("Python for Cyber Security") This Code is Run
Variable is
an item that contained a representation of
another item. Generally, in Python and programming,
that’s what variables are. They are just
representations of data stored in a form that is easy
to access and manipulate.
Let’s try creating some
variables now.
# Variables in python
x = 10
y = 20
name = "Andrew"
print(x) #  output 10
print(y) #  output 20
print(name) #  output Andrew
In the example above have three variables "x" which store integer value 10,
Variable "y" which store
integer value 20,
Variable "name" which store string / text value "Andrew"
We Use Equal Sign "=" in Python for
Assigning or Storing a value in that variable.
In process of naming Variables can be any name if they follow the following Rules of naming
Variables.
1. Variable it Contain only letters, numbers or underscore.
2. The first character is not a number.
3. The variable name is not one of the reserved keywords. Example of the reserved keywords is "input",
"print", "while" etc.
4. Uppercase and Lowcase letter are fine.
On the last important thing Python variables name are case sensitive so "varname" is different to
"varName"
1. Camel Case joining together compund words with upper case letter.
2. Snake case is just adding underscore between compout of variable names.
# Variables in python
thisIsCamelCase = 10
this_is_snake_case = 20
Operators are symbols that perform functions, and they are used to manipulate data in different ways. We have already touched on one operator, the assingment operator, which represented by an equal sing "=" to assing some variable by use equal sign
x = 10
y = 20
z = x
prit(x) # output 10
print(y) # output 20
print(z) # output 20
The output of variable y and z is the same because the variable y is assing to variable z
The operators that are found in Python
include:
1. Addition operator which add two value together "+"
2. Subtraction
operator which subtract two value "-"
3. Multiplication operator which multiply two values "x"
4. Division
operator which divide two values "/"
5. Floor division operator which divides and then rounds
down to the nearest whole number "//"
6. Modulus
operator Which produce the remaining of the division operation "%"
7. Exponent operator "**"
x = 10
y = 20
z = 5
a = x + y
b = x - z
c = x * z
d = z / y
e = z // y
f = z % y
g = x ** z
print(a) # output 30
print(b) # output 5
print(c) # output 50
print(d) # output 0.25
print(e) # output 0
print(f) # output 5
print(g) # output 100000
The assignment operator can be combined with other operators like addition, subtraction, and multiplication operators. This makes it easier to carry out operations in one step instead of multiple steps. To be clearer, here’s an example:
a = x + y
# we cold write
a += y
# Output is the same
A Data type in Python refers to the classification of data. It determines what kind of value a variable can hold and what operations cab be performed on thet value.
In Python is a dynamically typed language, meaning you do not need to declare data type explicitly.
And we have four primary data type in Python
1. Integer (int), used to store whole numbers
2. Float (float), used for numbers with decimal points
3. String (str), used to store text or characters
4. Boolean (bool), represent logical values: True or False
# Python Data Types
number = 3445 # This is integer data type
number_2 = 34.45 # This is float point number
name = "Andrew" # This is string
is_login = True # This is boolean with true value
is_active = False # This is booleas with false value
Is the process of converting data frome one type to another type. There are three helpful commands in
Python that will allow the quick and easy conversion between data types:
int()
float()
str()
All three of the above commands converts what is placed within the paranthesisi to the data type outside
the paretheses.
# Type Casting
number = int(33.45) # output 33
age = float(4) # output 4.0
name = str("your name") # get and error because you can not convert non numerical string into an integer
Data Structure is how data is stored, qne in python have many defferent data structures as follow
Lists are collections of data. When you think about a list in regular life, you often think of a grocery list or a to-do list. These lists are collections of items, and that’s precisely what lists in Python are: collections of items. Lists are convenient because they offer quick and easy storage and retrieval of items.
We could declare separate variables for all those values, or we could store them all in a single variable as a list. Declaring a list is as simple as using brackets and separating objects in the list with commas. So, if we wanted to declare a list of fruits, we could do that by doing the following:
Fruits = ["apple", "pear", "orange", "banana"]
It’s also possible to declare an empty list by just using empty brackets. You can later add items to the list with a specific function, the append function append( )
We can access the items in the list
individually by specifying the position of the item that
we want. Remember, Python is zero-based, so the
f
irst item in the list has a position of 0.
How do we
utilize the values from a list? We just declare a
variable that references that specific value and
position, as shown below: Apple = fruits[0]
Fruits = ["apple", "pear", "orange", "banana"]
Apple = fruits[0]
Pear = fruits[1]
print(Apple) # output apple
print(Pear) # output pear
If you want to start by selecting items from the end of the list first, instead of the front of the list, you can do this by using negative numbers. Passing “-1” into the brackets will give us the last item in the list while passing “-2” will select the second to last item.
If you want to choose multiple items from a list. This is achieved using the colon inside the brackets, with the value on the left of the colon indicating the first value you’d like to select and the value on the right side of the colon indicating where to stop selecting values. This means that if you had a list containing 6 items, the notation list[1:4] would select the second item in the list (remember, zero-based) through the fourth item.
This style of using brackets and colons to select
portions of a list is known as list slicing.
You can also slice with the assistance of a third input,
referred to as a stepper. If you had a list of numbers
running from 0 to 8, you could slice it by getting
every other number instead of every number from a
starting point to an endpoint. Let’s assume we want
to slice the list of numbers and get every other
number. We could do this by using the following
commands:
numbers = [0, 1, 2, 3, 4, 5, 6, 7, 8]
num = numbers[0:9:2]
print(num) # output is [0, 2, 4, 6, 8]
You can slice like [:12] would start from the first item and run until the eleventh item on the list. In other words, [:12] is a shorthand version of writing [0:12].
Lists can be modified in several different ways. Items can be added or removed from the list, but the value of individual items in the list can be altered as well.
To change the value of an item in a list, you declare which index of the list you want to alter, followed by the value you want to replace it with. For example, you could update the fourth item on a list to a value of 15 by doing the following:
Numbers[3] = 15

# More function used in list as follow:
#   append() add a new item to the end of the list
#   remove() delete the item on the list by specify which index
#   insert() insert values at specific position in a list
Tuples are very similar to lists, but unlike lists, their contents cannot be modified once they are created. Items that exist in tuples when created will exist for as long as the tuple exists.
is_tuple = ("Monday", "Tuesday", "Wednesday", "Thursday", "Friday", "Saturday", "Sunday")
dictionaries contain pairs of keys and values that are associated with those keys. When you declare a dictionary, you must provide both the value and the key that will be associated with that value. These keys must be unique. Evidently, it would be a problem if one key could open multiple boxes, so keys in a dictionary cannot be repeated;
The syntax for creating a key in Python is to use curly braces containing the key on the left side and the value on the right side, separated by a colon. To demonstrate, here is an example of a dictionary:
dictionaries_expample = {"key1": 39, "key2": 21, "key3": 54}
ictionaries can also be declared by using the dict( ) method. You could create the same dictionary as above with keys and their values by using the assignment operator and separating them with commas.
dictonaries_example = dict(key1 = 39, key2 = 21, key3 = 54)
input() is a function used to take input from a user and utilize it. Utilizing the input functions enable us to prompt the user to enter information and which can further manipulate or can save as a variable. Example
cars = input("What's your favaorite car?: ")
We’ve already dealt with the print( ) function quite a
bit, but let’s take some time to address it again here
and learn a bit more about its advanced features.
By now, you’ve gathered that it prints out whatever is
in the parentheses of the function to the terminal. In
addition, you’ve learned that you can format the
printing of statements with either the modulus
operator (%) or the format function ( .format( ) ).
However, what should we do if we are in the process
of printing a very long message?
In order to prevent a long string from running across
the screen, we can use triple quotes to surround our
string. Printing with triple quotes allows us to
separate our print statements onto multiple lines. For
example, we could print like this:
print('''By using
triple quotes we can divide our print statement onto
multiple lines, making it easier to read.''')
Formatting the print statement like that will give us: By using triple quotes we can divide our print statement onto multiple lines, making it easier to read.
We’ll start with a look at conditions and conditional logic.
The following are the comparison operator
#  "==" this is a comparison operator
#  ">" or ">=" checks that the value on the left is smaller than the value on the right side
#  "<" or "<=" checks that the value on the right is smaller that the value on the right side
#  "!=" used to check that the value on the right is not same on the value on the left side
These comparison operators can also be combined with three different logical operators. Logical operators are used to tell the computer that it must take multiple conditions into account, not just one. the following are the three logical operators are and, or, not
1. "and" operator used to state that all the provided conditions must be true for the overall statements
to be evaluated as True.
if one portion of the of the statement is False, the whole statement will be evaluated as False. example
10 < 5 and 5==5 will be evaluted as False.
2. "or" is used to check only one part of statement is true. If at least one part of a statement is
true, then the entire statement is evaluated as True. Example 5 == 5 or 9 > 12 will be evaluated as
True
3. "not" is used to change the True statement into False and False statement into True one.As an
example, the statement not 12
> 1 5 , will evaluate as True since 12 is not greater
than 15
The if statement is used to allow programs to check whether a certain condition has been fulfilled. If the provided condition is met, then the program will carry out the specified action that follows. The if statement is telling the computer to “do this only if this condition is met.” The if statement is used in conjunction with another control flow operator: the else statement. The else command is used to specify what the computer should do if the provided criteria isn’t met. Therefore, an else statement must come after an if statement.
difficulty = input("Choose '1' for 'Easy', '2' for 'Normal', '3' for 'Hard', or '4' for 'Impossible': ")
if difficulty == "1":
    print("Easy difficulty chosen.")
elif difficulty == "2":
    print("Normal difficulty chosen.")
elif difficulty == "3":
    print("Hard difficulty chosen.")
elif difficulty == "4":
    print("Impossible difficulty chosen.")
else:
    print("Please enter a valid difficulty.")
A For loop is used to iterate over a sequence like (list, tuple, string, or range). It is mainly used when the number os iteration is known
#for variable in sequence:
    # code to excute
for i in range(0, 10, 2):
    print(i) # Output is number printed from 0 up to 9 with the intervals of 2 digits
While loop is used to execute a block of code as long as a condition is True. It is useful when the number of iterations is not known
while condition:
    # code to execute
# Print number from 1 up to 5
i = 1
while i <= 5:
    print(i)
    i += 1
When you create fo r loops, sometimes you may want to end the loop early, stopping the loop when a certain criterion has been fulfilled, rather than iterating through the entire loop.
The break keyword is utilized to end a loop early by exiting a loop and moving on to the next line in the program. Here’s an example of how the break keyword can be used:
is_tuple = ("Monday", "Tuesday", "Wednesday", "Thursday", "Friday", "Saturday", "Sunday")
for days in is_tuple:
    print(days)
    if days == "Wednesday":
        break
print("Loop is Ended")
Continue statement is used to skip the current iteration and move to the next loop iteration
is_tuple = ("Monday", "Tuesday", "Wednesday", "Thursday", "Friday", "Saturday", "Sunday")
for days in is_tuple:
    if days == "Wednesday":
        continue
    print(days)
These two statements are used in conjunction to control errors that may occur in your code. The try statement is used to specify what the computer should try, and the except statement is used to determine what should happen next if the operation cannot be carried out successfully. A try & except block can be set up like this:
try:
    # Action to try
except:
    # Do this instead
Read the example below
# A simple calculator
operator = str(input("Enter Operator either +, -, *, /, and %:  "))
try:
    a = int(input("Enter first number: "))
    b = int(input("Enter Second number: "))
    if operator == "+":
        result = a + b
        print(f"Your answer of Addition is {result}")
    elif operator == "-":
        result = a - b
        print(f"Your answer of Subtract is {result}")
    elif operator == "*":
        result = a * b
        print(f"Your answer of Multiplication is {result}")
    elif operator == "/":
        result = a / b
        print(f"Your answer of Division is {result}")
    elif operator == "%":
        result = a % b
        print(f"Your answer of Modulus is {result}")
    else:
        print("Please! Enter a valid operator")
except:
    print("Please Enter a valid Number")
While the excep t keyword is a general error keyword you can use, Python comes with many predefined error messages that are built-in. These unique error handlers can be used to control a variety of different possible errors, and they should trigger automatically when these associated error conditions occur. Here are some of Python’s built-in error keywords and their use cases:
ValueError - Used when a value is of the incorrect
type. For instance, it can be used when a value
entered by the user needs to be converted into an
integer, but the user has entered an incompatible
string.
ZeroDivisionError - This error is triggered when trying
to divide zero, which is impossible.
ImportError - This error is triggered when Python has
been instructed to import a module, but the module
cannot be found or otherwise cannot be imported
successfully.
IOError - This Input/Output error notification occurs
when an I/O operation cannot complete. For instance,
this error would trigger when an open( ) command is
called, but the provided file cannot be found.
Index Error - This IndexError occurs when a provided
sequence index is out of the range of the sequence
that has been provided.
KeyError - This error is triggered when a dictionary
key is provided, but the provided key does not exist
or can’t be found within the dictionary.
TypeError - This error occurs when some function or
operation has been applied to a data type but the
operation cannot be carried out successfully.
NameError - This occurs when a designated variable
name isn’t found.
Each of the pre-defined errors has a pre-defined error
message. The error messages can be displayed by
setting the error as a variable and then printing the
variable.
In Python, functions and modules are important tools used to build efficient and reusable programs. In cyber security, they help automate tasks such as scanning systems, analyzing data, and testing networks.
A function is a reusable block of code that performs a specific task. It helps reduce repetition and makes code easier to manage.
def add(a, b, c):
    return a + b + c

print(add(1, 2, 3))
The function above requires exactly three arguments. If one argument is missing, Python will return an error.
To allow a function to accept any number of arguments, Python provides *args. This makes the function more flexible and useful in real-world applications.
def add(*numbers):
    total = 0
    for num in numbers:
        total += num
    return total

print(add(1, 2))
print(add(1, 2, 3, 4))
print(add())
The *args parameter collects all values into a tuple, allowing the function to run without errors even if no arguments are passed.
Default arguments allow functions to work even when some values are not provided. This helps prevent errors.
def add(a=0, b=0, c=0):
    return a + b + c

print(add(1, 2))
print(add(5))
A module is a file that contains Python code such as functions and variables. Modules help organize code and allow reuse across different programs.
You can also create your own module by writing functions in a separate file and importing them into another program.
# scanner.py
def scan_target(target):
    print("Scanning " + target)
# main.py
import scanner

scanner.scan_target("192.168.1.1")
# main.py
from scanner import scan_target
scan_target("192.168.1.1")
Discription of the topic